Guidance on using Miro whiteboards
Registering for Miro whiteboards
Whether you are applying for a Tier 2 or a Tier 3 subject, we recommend that you create a Miro account on a computer in advance of your interview.
![]() In order to create a Miro account, head to www.miro.com, and select ‘Sign up free’ in the top right corner.
In order to create a Miro account, head to www.miro.com, and select ‘Sign up free’ in the top right corner.
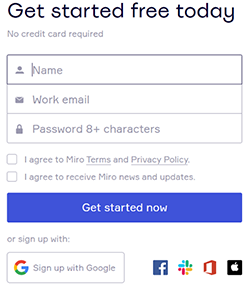 You’ll be taken to the sign-up page, where you will be asked for your name and email, and to create a password. Don’t worry about it asking you for a ‘Work email’ – your personal email will do just fine.
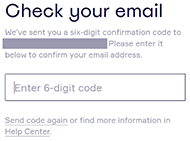
You’ll then be sent a confirmation code to your email address, which you’ll need to enter on the next screen:
Once you’ve confirmed your email address, you’ll be asked to set up your team. You will be asked a selection of questions that ask you to personalise your Miro experience. It does not matter how you answer these questions, and you can name your team whatever you like. When asked if you want to invite team members, you can just select ‘Skip for now’
![]()
On the next page you’ll be asked what you want to do, but you will want a blank whiteboard to practise on, so select ‘Start from scratch’ in the bottom right.
![]()
 You’ll then be taken to ‘My First Board’, which will be a completely blank whiteboard. You can use this board, or you can create a new whiteboard.
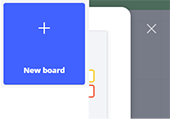
To do this, click the ‘Miro’ icon in the top left to go to your dashboard. Then click ‘New board’, and then ‘Create a shared board’ (it won’t be shared with anyone if there is no one else in your team).
This will bring up a template selection menu – just click the cross in the top right to close this window in order to use a blank whiteboard.
Once you’ve got a blank whiteboard you are ready to practise! Check out the Miro guidance for your Tier to understand what you might be asked to use in Miro.